 |
BLIND CONTOUR DRAWING
lesson
|
Definition of Blind Contour Drawing
Blind contour drawing is done by looking intently at the edge of an object, but never looking at the paper while the pencil moves. We call it blind because we are not allowed to look at the drawing paper while the pencil moves. In some lessons, we use a large blinder card on the pencil. Blinders were not used for the bear drawings shown here. All these drawings were done by sighted children observing a large teddy bear.
Why teach children
Blind Contour Drawing?
-
To overcome stereotype ways of seeing and drawing.
- To make the right brain more assertive and aware of the observable look of what we are drawing. We now use the the term r-mode thinking because brain science has broadened the learning to include more than the right hemisphere of the brain.
- To balance the left brain's (l-mode thinking) tendency to standardize, generalize, and simplify everything.
- It demystifies drawing and learning to
draw. Virtually anybody can improve their drawing ability with
this method. Child who learn to do blind contour drawing before
they are eight can be saved from the frustration of not knowing how to
learn to draw better. In this lesson the children were told that today they are learning how to learn how to draw.
- I stand next to the bear and trace my finger around the edges at the speed of a crawling bug.
- Students practice in the air to build confidence. They point to the outline and slowly draw it in the air.
- Draw without looking at the drawing paper.
- Slowly follow the edge of the object with the eye while the pencil makes the same movement on the paper.
- Never look at the paper while the pencil moves.
- Using a blinder on the pencil reduces the temptation to watch the paper.
- Look at the paper only when placing the pencil at a new starting position.
- Select subjects that are unfamiliar enough so that the student does not have a memorized shape in mind. This encourages better visual concentration.
- If the subject is familiar, invert it or place it in a new position to make it look new.
- Keep it easy enough to avoid frustration, but hard enough to be challenging.
- Avoid copying pictures. Even inverted pictures confuses the learner about best practices.
- Select content that students think is interesting. Toys, sporting equipment, sculpture, clothing, and so on are possibilities.
-
Run your finger along the edge that students see and show how slowly the eye most move in order to catch the details of the edge. Avoid drawing an example. We do not want students to learn the teacher's image. We want them to learn to see any and every subject.
-
Ask students to practice drawing in the air and watch how fast they move and remind them to practice it slowly to catch all parts of the contour (edge) line.
- Allow some false starts, encouraging more than one attempt on each sheet of paper. Encourage multiple practices in order to pick out a best one to develop.
-
Many children find it easier to resist looking at the paper if they are asked to use blinders (helpers) on their pencils. These are 8x8 inch squares of cardboard with a hole in the center. The pencil is placed through the hole so it is hard to see what the pencil is drawing.
-
Allow erasing to make corrections so long as the life (spontaneity) is not all lost from the drawing.
- Sometimes it is easier to break stereotypes
if a familiar subject is inverted.
|
Drawing Examples from Grades 3 to
6
After
gaining confidence during preliminary practice,
children in grades three to six made blind contour observation
drawings of a large stuffed bear. They then added textural
shading to their drawings of Ralph. Scroll down to see a few
examples. |
|
 |
|
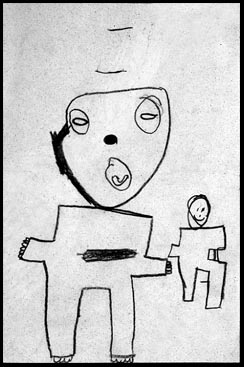 |
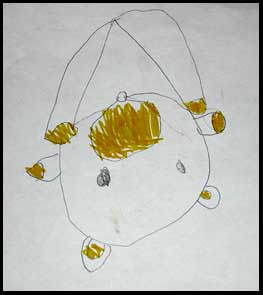
A few children may find blind contour drawing particularly difficult. The
child who made this drawing of Ralph the bear was unable to draw from
observation by the blind contour method. She was the only one in
a class of 24 third graders who was unable to see the actual contour on the first
day the method was introduced. All the fourth, fifth, and sixth graders were able to follow the method and achieve reasonable results. Nevertheless, this child's work was accepted along with the others. She made a valiant attempt. She may catch up with practice, or she may benefit from other approaches. As teachers, there are a few cases that confound our efforts. This student may have been learning more than we know by doing this work even though it is not based on the same level of observation as others. It is possible that she has some unique learning challenges. |
 |
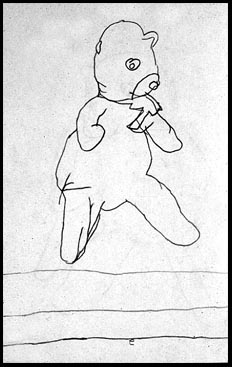
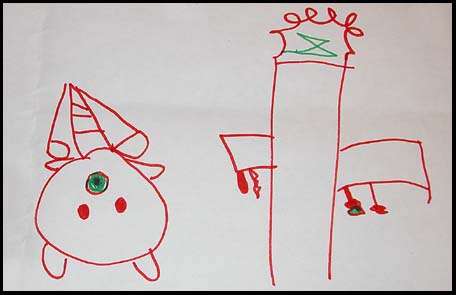
This is the first
attempt at blind contour by a fourth grade child. Note that he
started over once. He was able to represent several different
shading and texture tones. He used the bottom part of his paper
for practice. Students were told not to worry if the lines were different than they expected. I told them, "We are practicing. Today we are learning how to learn how to draw. When you are learning something new it will easier after you have practiced many times. Today is the first practice so just do the best that you can." |
 |
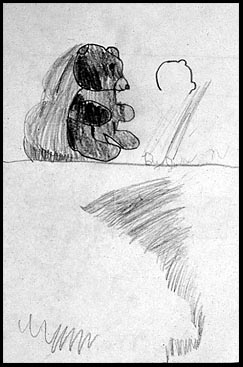
This blind contour drawing by a fifth grade child shows shadows as well as shading created by flood lights that emphasized the variation in the tones. During the preliminary warm up, each student hugged or petted the bear. During the preliminary warm up, they each filled four one-inch squares with textures that they drew while listening to various textural noises that I produced. During the preliminary warm up, each student drew a series of continuous lines across the top of the page. One was very dark. The second was very light. The third was a medium line. |
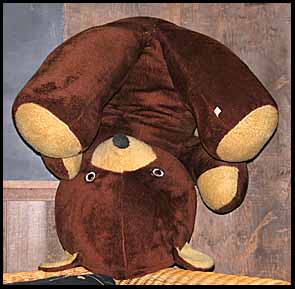
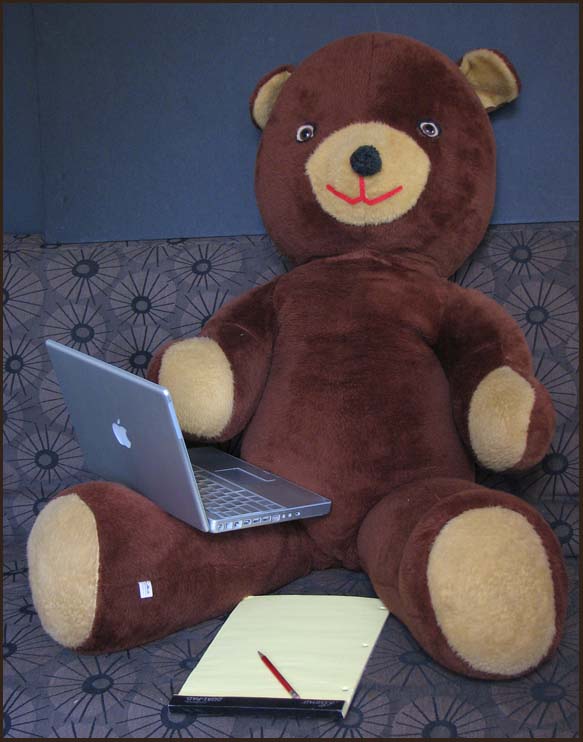
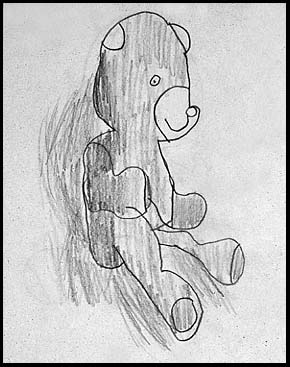
Ralph is a big stuffed teddy bear shown here in my office. Our daughter named him. She grew up reading books with her head on one of Ralph's legs. Hence, his legs are dented in on top. This shows up in most of the drawings. As they came into the room, each child was introduced to Ralph and invited to give him a big hug or just pat him a bit.
Ralph did not bring the computer to class when he posed for the children, but he likes to pose with it to show you how big he is. His considerable size and infinite patience was a very helpful. -mb
Other ways to draw
In addition to direct observations, other good sources for children's drawings include, their imaginations, their everyday experiences, their memories, and events in their lives. To motivate and inspire them to draw and learn more, I ask them questions that help them notice things and get ideas. I never draw for them. Questions and their own experimentation can also help them with elaboration and refinement. I am affirmative specific aspects of their work. I treat their efforts as a gift no matter how it looks. When they are corrected in their drawing, young children will automatically move to a less beneficial activity such as watching cartoons on TV. Rather than show them examples of artwork to inspire them, I assign warm up activities to get them in the mood, focused, and to build confidence.
In addition to blind contour drawing, observation can be learned in a very expressive way with gesture drawing. These links have descriptions of gesture drawing.
Portrait and Figure Drawing has a gesture drawing section.
http://www.bartelart.com/arted/figure&portrait.html#figure
Learning to Draw by learning the basic seeing and drawing skills needed to draw everything
http://www.goshen.edu/art/ed/drawingskills.html#gesture
Motivating Non-Drawing Students
http://www.goshen.edu/art/ed/talent.html#gesture
An online book with eight drawing lessons - 
All rights reserved. © Marvin Bartel. 2008, updated in October, 2011. Permission is required to copy or publish any parts of this page. Mention the URL or the title of this page in your correspondence. Quotations or other references to this page must include a link to this page.
Links to related pages by the same author
Teaching Creativity Creativity Killers Make Drawing Easier and Harder
The Conversation Game to Get Ideas
The Secrets of Generating Art Ideas - An Inside Out Art Curriculum
Goshen College Art Department
Marvin Bartel Home